How to Create and Manage Chat Tags in CXWizard
Learn how to create chat tags, assign them to conversations in your inbox, and filter chats by tag to stay organized.

Tags help you organize conversations in your CXWizard inbox. A tag is a colored label you attach to a chat so you can quickly see what kind of conversation it is, who it relates to, or where it stands in your workflow.
Common reasons to use tags include:
- Grouping chats by topic (for example, billing, shipping, or product questions)
- Marking priority or status (for example, VIP, follow-up needed, or resolved)
- Segmenting leads by source or campaign so your team can prioritize follow-ups
Once tags are in place, you can assign them to individual chats and filter your inbox to show only the conversations that match.
Creating and assigning tags to a chat
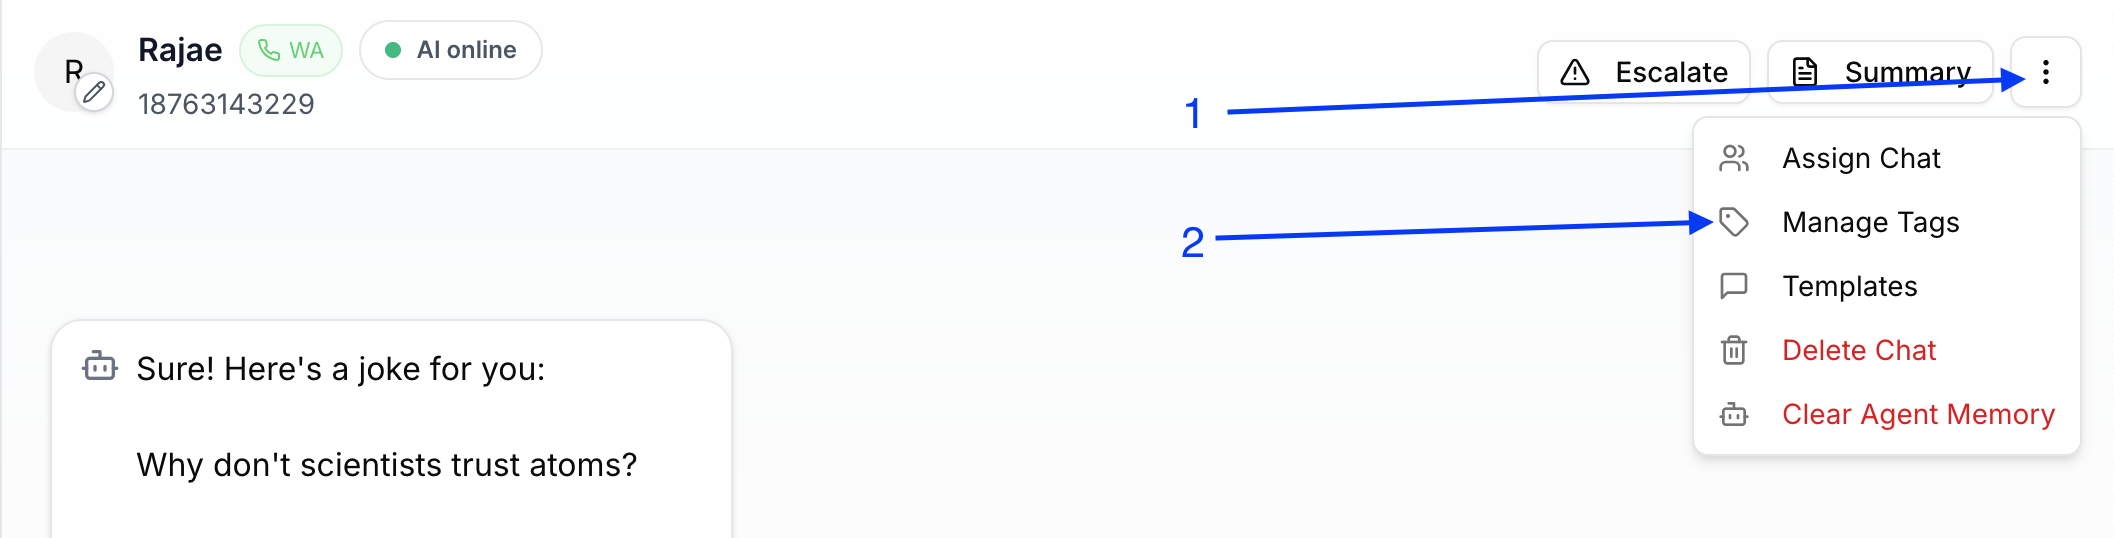
Step 1: Open Manage Tags from the conversation header
Visit your inbox and select a chat. In the conversation header, click the more options icon (three vertical dots), then click Manage tags in the dropdown.
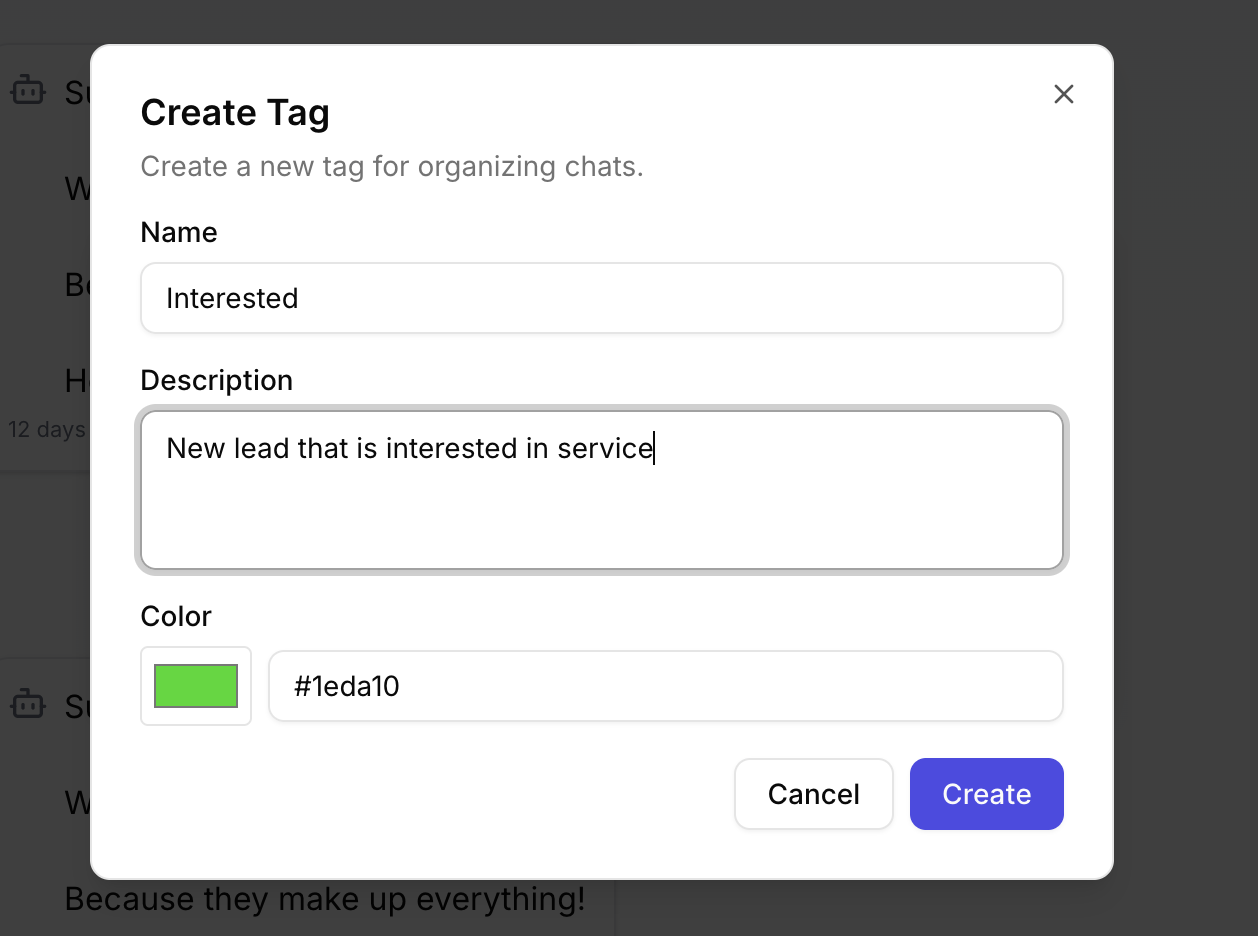
Step 2: Open the tag list or create a new tag
You will see a list of your existing tags to select from and assign to the contact. To create a new tag, click the Create tag button.

Step 3: Name your tag and choose a color
When creating a tag, give it a name and a color. You can optionally add a description to explain when the tag should be used.
Step 4: Select your new tag from the list
After you create the tag, it appears in your list of tags ready to assign.
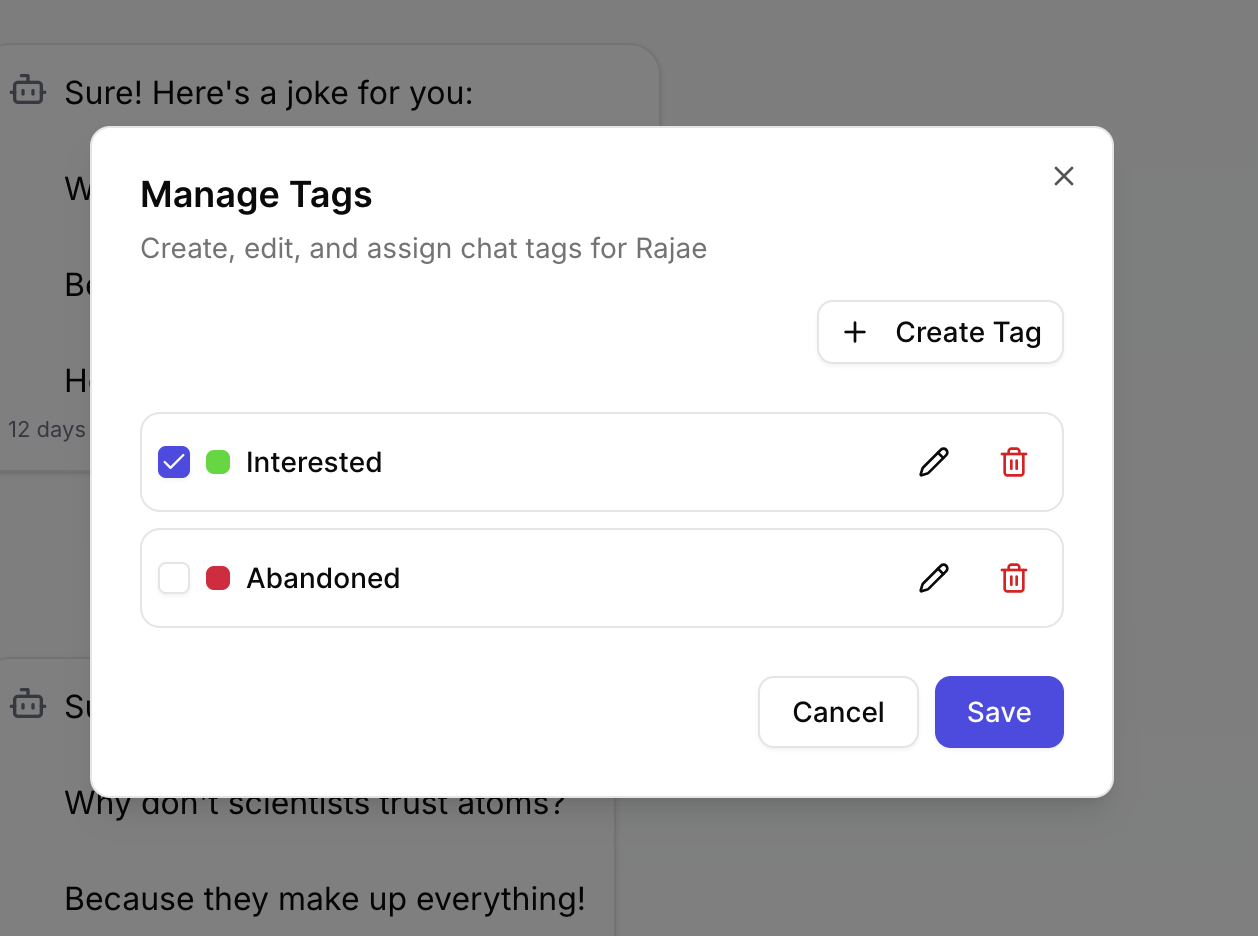
Step 5: Save and confirm the tag on the chat
Select the tag(s) you want on the chat, then save. The chat UI updates to show the assigned tag(s) in the chat list.
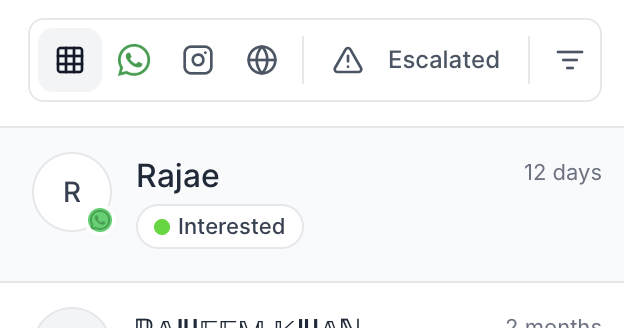
Filtering chats by tags
You can narrow your inbox to specific tags when you need to focus on one segment of conversations.
- Click the more filters icon in your inbox.
- Select the tag or tags you want to filter by.
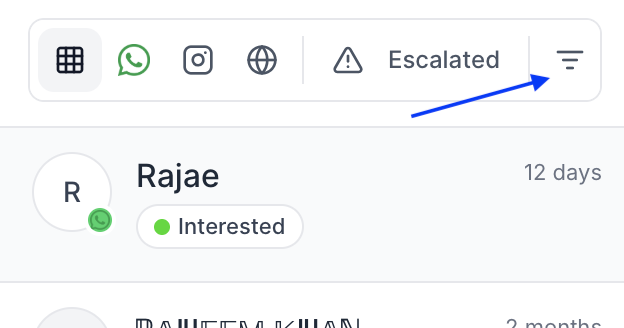
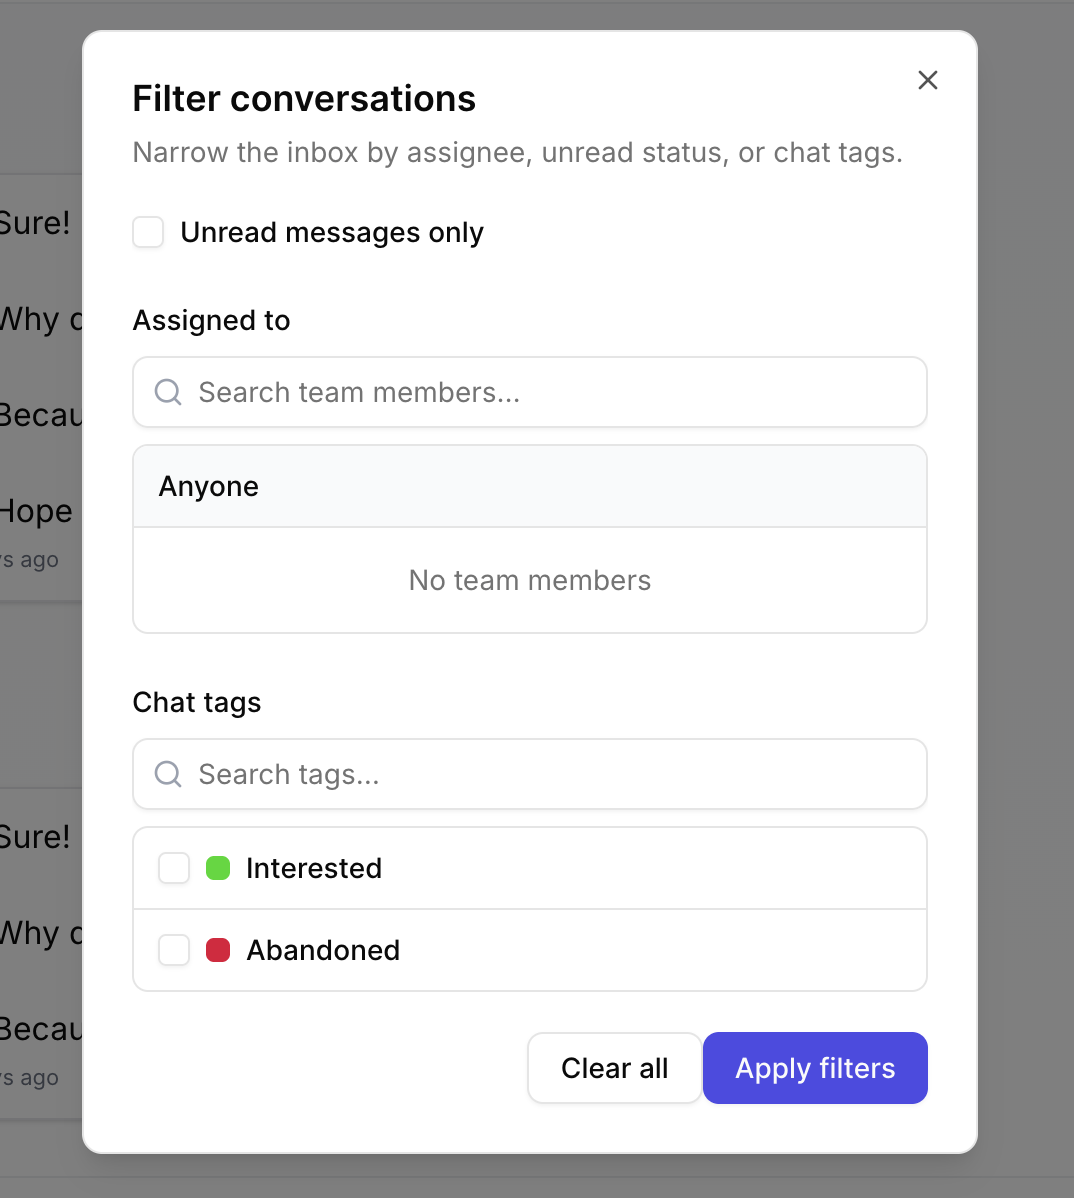
Your inbox will update to show only chats that match the selected tags. Clear the filter when you want to see all conversations again.
Related tutorials
- How to Add Team Members to CXWizard: Invite teammates and assign chats so everyone knows who is handling each conversation.
- Getting Started with CXWizard: Set up your AI agent, connect channels, and start managing customer conversations.

