Getting Started with CXWizard
Learn how to set up CXWizard to automate your sales and support with smart AI agents.
If your business is dealing with high volumes of inbound leads or customer support requests, you already know how quickly things can get overwhelming. Missed messages mean missed sales, and slow responses push customers away. CXWizard helps you solve this by letting AI agents handle customer conversations across your platforms 24/7 so your team can focus on what matters most.
This guide walks you through everything you need to get your AI agent up and running.
Creating your AI agent
To create your AI agent, go to the 'Agents' page and select 'Create Agent'. You can create multiple AI agents based on your plan limit. Also, you can choose to use one AI agent across multiple messaging channels or choose to use separate AI agents for each channel.
By default your AI agent will:
- Have a tool to escalate the conversation to a human when necessary. You will be notified by email to visit your inbox and respond.
- Have the ability to process and respond to images, voicenotes and documents sent on WhatsApp and Instagram Messenger. No additional setup necessary.
- Have a tool to access information from its knowledge base to get more detailed information about your business and FAQs.
Step 1: Crafting a prompt for AI agent
You will have to give your AI agent a prompt. Think of this as a brief but clear description of:
- What your business does
- What kinds of questions or tasks you want the AI to help customers with
This step is critical. Your AI will do exactly what you instruct it to do, so a well-written prompt is the foundation of a well-performing agent. If your agent doesn't respond the way you expect in certain scenarios, you can always come back and refine the prompt.
A strong prompt should clearly define the business, services, target audience, tone, and desired outcomes. Give behavioral rules such as asking clarifying questions before recommending solutions, avoiding unsupported claims, and guiding users toward conversion actions like booking or purchasing. Finally, add example conversation flows and sample responses so the AI understands the expected style and structure. Keep instructions practical, concise, and brand aligned, focusing on how the assistant should think and respond.
Think of it as explaining to a new sales or customer support rep you just hired what your business is and how to handle customers.
Not sure where to start? Select one of CXWizard's templates and modify it to fit your business or use a tool like ChatGPT or Claude to help you draft a prompt.
Step 2: Build Your Knowledge Base
Once your prompt is set, it's time to give your agent more detailed information about your business by going to your Knowledge Base.
The more your AI knows about your business, the more accurately it will respond to customers.
You can populate your knowledge base in three ways:
- Upload documents — Add files that explain your business processes, policies, pricing, or any other relevant information.
- Scrape your website — CXWizard can pull content directly from your website to train your agent on what's already published.
- Add FAQs — Enter common questions and answers so your agent is ready for the most frequent inquiries right out of the gate.
The goal is to give your AI as much context as possible, so it can handle a wide range of customer situations with confidence.
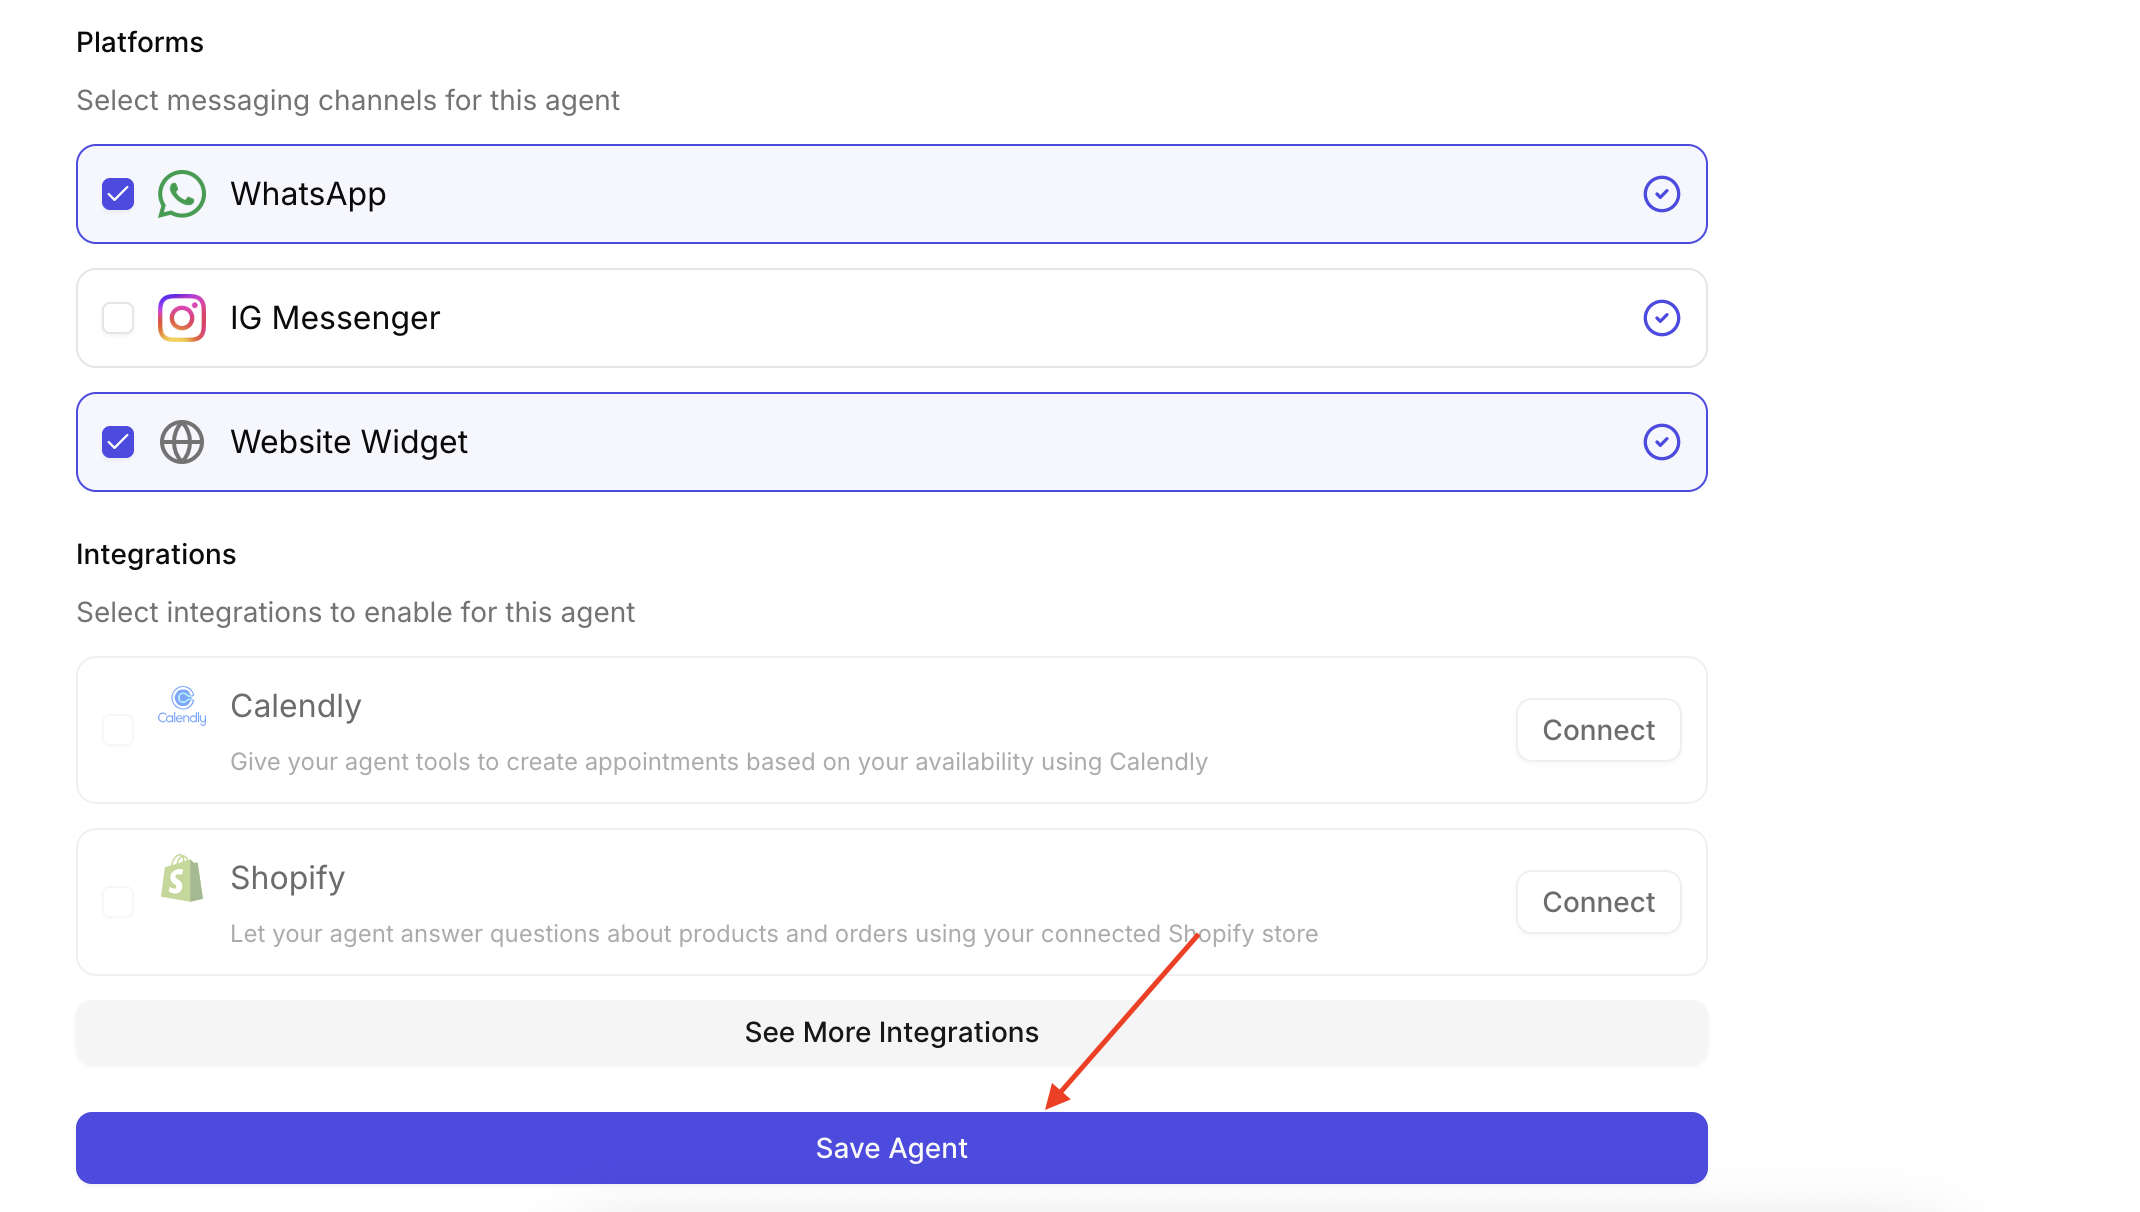
Step 3: Connect a Messaging Channel
Your AI agent needs somewhere to talk to customers. CXWizard supports the following channels:
- WhatsApp — CXWizard is a verified Meta Tech Provider, so you can connect your WhatsApp Business account directly.
- Instagram DMs — Handle direct message inquiries on Instagram automatically.
- Website Chat Widget — Embed a chat widget on your website so visitors can get instant support while they browse.
Go to the Integrations page to set up a messaging channel.
Step 4: Connect Your Business Integrations (Optional but Powerful)
If your business uses third-party tools for scheduling or e-commerce, connecting them to CXWizard allows your AI to take actions like scheduling appointments and checking order status. Currently supported integrations include:
- Calendly — Your AI agent can check availability and book appointments on your behalf.
- Shopify — Your agent gains the ability to answer questions about products, check order status, and assist with order-related inquiries.
These integrations transform your agent from a support responder into a proactive sales and operations tool.
Step 5: Save your Agent then Enable it
After adding to your knowledge base and connecting your messaging channels and integrations, go back to your create agent form. At the bottom of the form, click "Save Agent".
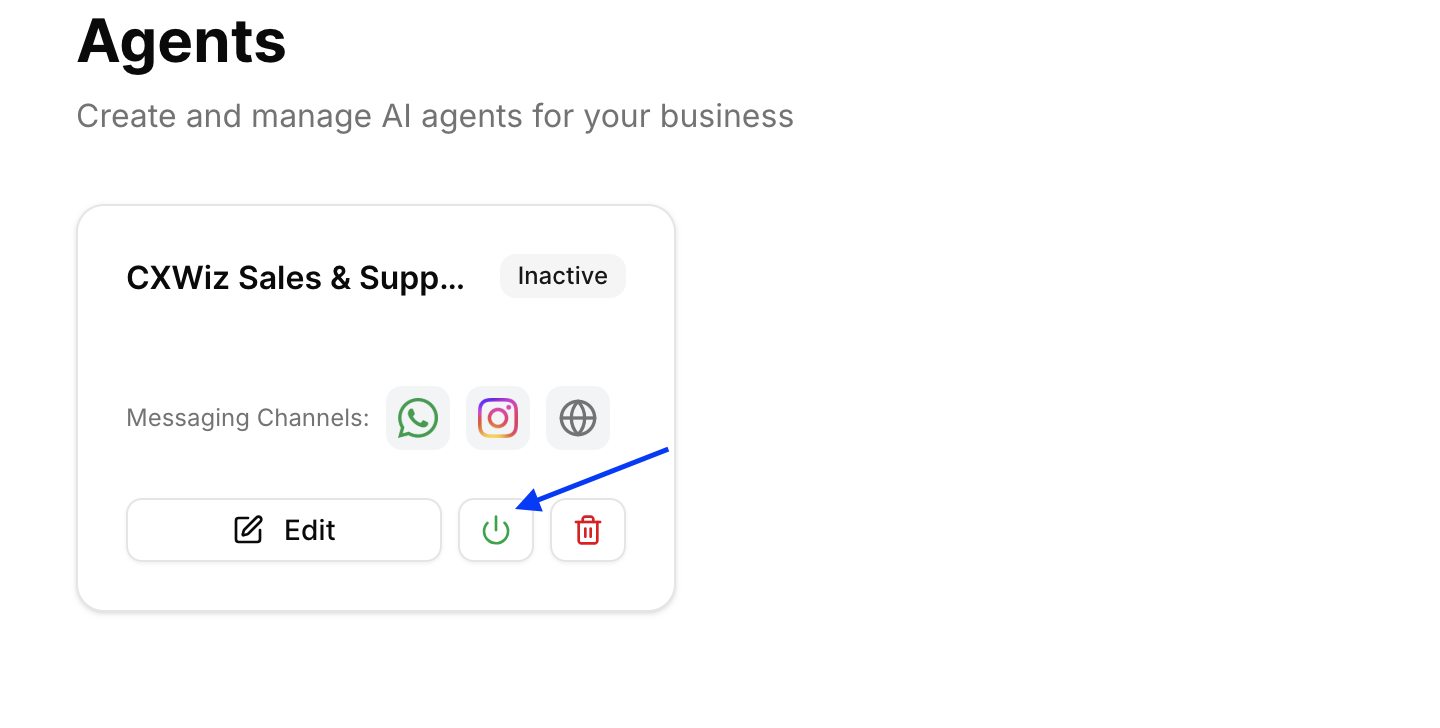
Then on the Agents page, click the power icon on your agent to enable it.
After enabling your agent, send your agent some test messages. Don't just send text messages. Try sending a voice note, an image, or a document your customer would send. This is your chance to catch any gaps in your prompt or knowledge base before real customers do.
If something doesn't feel right, go back to Step 1 and tweak your prompt, or add more information to your knowledge base.
Need Help With Your Setup?
If you get stuck at any point, CXWizard's support team is available to walk you through the process. You can talk with an expert or reach out to us on WhatsApp.